

- Keep pushing the bow at the target and pulling the string hand back after the release, until the arrow lands.
- Dropping the bow arm early is a common reason for low shots.
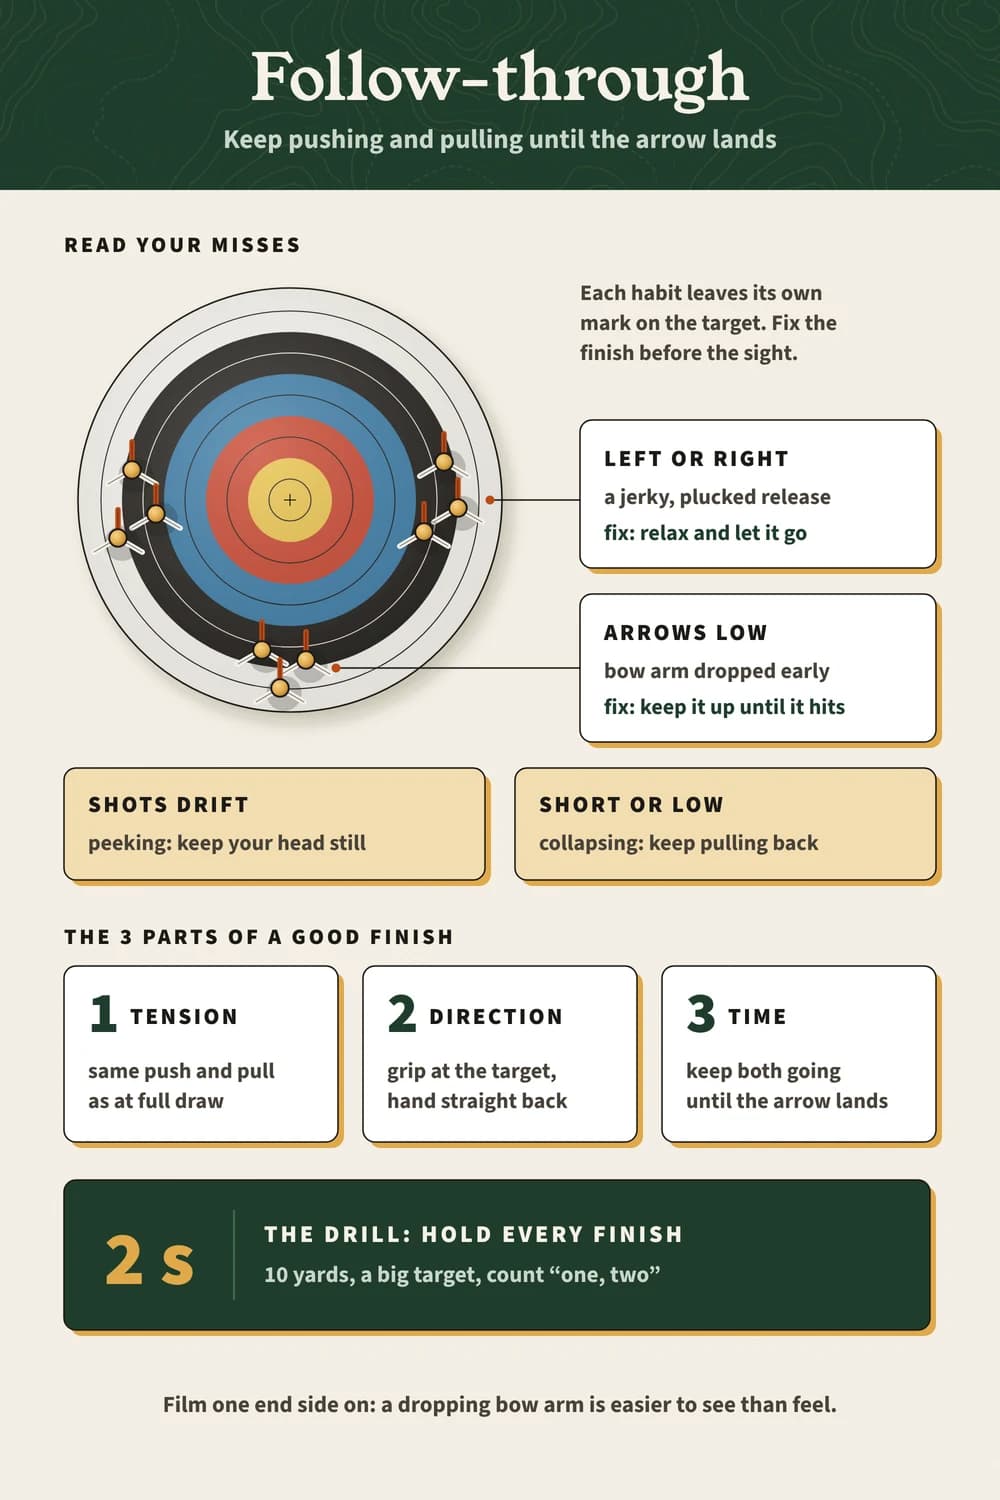
- Your misses tell you which part of the finish broke: low, left-right or short.
- Build it with a 2-second hold at 10 yards, then check it on video.
The aim looked perfect at full draw. The arrow landed low anyway. 😤
What went wrong happened in the second after the release, and the fix is to keep pushing the bow at the target and pulling your hand back until the arrow hits. Build it once your anchor point is steady, and your groups tighten without changing anything else.
How follow-through works: the shot isn’t over at the release
Follow-through is what you do the moment after your fingers let go. The arrow is still on the string for a split second, so anything you move in that moment moves the arrow too.
Olympian Jake Kaminski explains it in the video further down this post. Listen for how simple he makes the rule:
The general rule of thumb is to just continue doing whatever you did when you were at full draw, other than no longer having the string in your fingers.
That’s the whole idea, and I agree with it. A good finish isn’t a pose you add after the shot; it’s the same push and pull you had at full draw, carried on for another second.
He breaks it into three parts, which makes it easier to check on your own:
There are three principles that make up a good follow through: tension, direction, and time.
- Tension: keep pushing the bow forward and pulling the string hand back, with the same effort as at full draw.
- Direction: push the grip toward the spot you’re aiming at, and let the drawing hand travel straight back past your face.
- Time: keep both going until the shot has finished, which for a beginner means until the arrow lands.
Direction is the one most beginners miss. A bow arm pushed at the target can’t drop, and a hand pulled straight back can’t fly out to the side.

// Free printable
Get the range log I actually use.
Seventeen printable pages: session log, score tracker, a 30-day drill challenge, a bow maintenance card, a first-season checklist and more. Join the monthly email and it lands right away.
What a good finish looks like: a 4-point check
A good finish looks almost boring: nothing jumps. Check these after every shot untill they’re automatic.
- Bow arm: stays up and aimed until the arrow lands.
- Drawing hand: relaxes and slides back near your neck or shoulder, not out to the side.
- Head: stays still; you watch the arrow fly into the target.
- Shoulders: stay set, without collapsing forward.
When I started my whole shot was rough, from the draw to the finish:
I was pulling the string so awkwardly and incorrectly.
So a shot like that has no finish to hold. Fix the draw and anchor first, then the follow-through has something to carry on.
Read your misses: follow-through mistakes and their fixes
Each habit leaves its own mark on the target. Read your misses and you’ll know what to fix, before you touch your sight or your bow.
| Mistake | What it does | Fix |
|---|---|---|
| Dropping the bow arm early | Arrows land low | Keep the arm up until the arrow hits |
| Jerky or plucked release | Arrows go left or right | Relax the fingers and let the string go |
| Peeking to watch the arrow | Shots drift as the head moves | Keep your head still and look through the shot |
| Collapsing at the release | Shots fall short or low | Keep pulling back through the release |
How to build follow-through: a 2-second drill
Hold every finish for a slow count after the release. Two seconds is plenty to make it a habit, and one session at short range is enough to feel the difference.
- Shoot at 10 yards at a big target, so you can stop thinking about aiming.
- After the release, count “one, two” with the bow arm still pushing at the target.
- Ask yourself: did I see the arrow go into the target before I moved?
- Repeat for a full session before moving back.
Kaminski’s line on when a shot really ends is the one I’d keep in your head during this drill:
The shot does not end when you let go of the string, the shot ends when you finish your shot.
For him, the finish is when his back shoulder runs out of room. For you, starting out, make it the arrow hitting the target: it’s easy to check, and it’s long enough that you can’t cut the shot short.
Follow-through on a compound or with a release aid
The same rule holds on every bow. A release aid takes the fingers out of the release, not the bow arm out of the shot, so a compound archer who drops the bow early still lands low.
Kaminski says the same three parts apply whether you shoot a traditional bow, a recurve, barebow or a compound. Hold the finish, whatever you shoot.
Here's the whole finish on one page, from reading your misses to the drill that fixes them.
// FAQ
Frequently asked questions
Quick answers to the questions readers ask most.
How long should you hold your follow-through?
Until the arrow lands, about two seconds at short range. Counting “one, two” after the release builds the habit.
Why do my arrows hit low?
A common cause is dropping the bow arm at the release. Keep pushing it at the target until the arrow hits.
Where should my drawing hand go after the release?
Let it relax and move straight back, finishing near your neck or shoulder, rather than flying out to the side. A clean archery release starts that motion.
Does follow-through matter with a compound?
Yes. A compound with a release aid is less sensitive to finger release, but dropping the bow arm still pulls shots low.
Final thoughts
Follow-through costs nothing and fixes a lot. Keep pushing, keep pulling, watch the arrow land, then relax.
Track your groups in the free range log for a week of two-second finishes and compare.
