
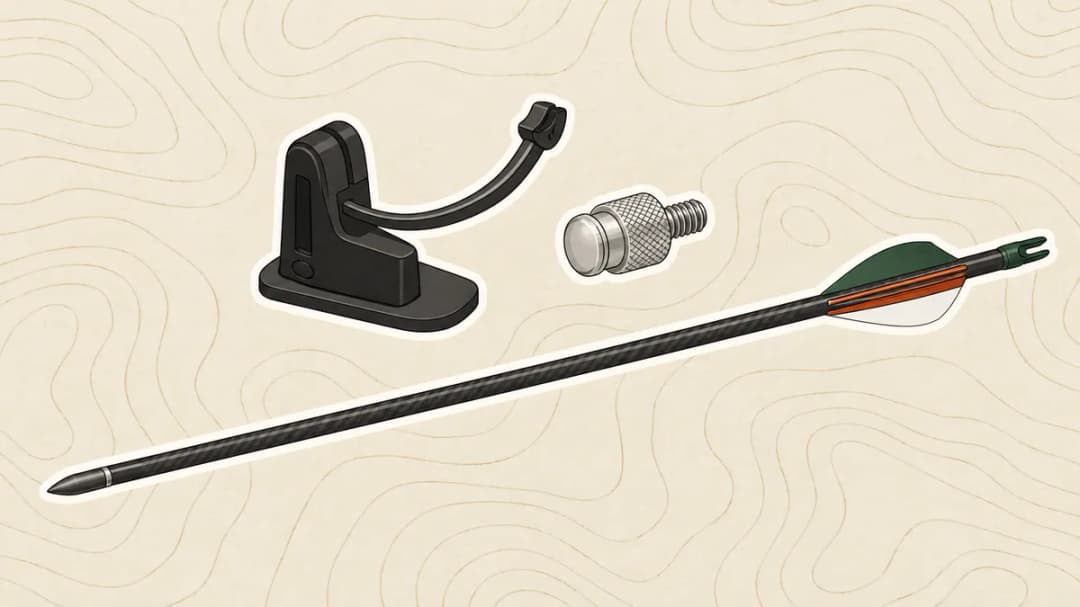


- On a beginner recurve, a stick-on rest is the right first rest: cheap, light and hard to get wrong once it’s fitted straight.
- Many recurves and longbows shoot off the shelf, the ledge cut into the riser, usually with feathers.
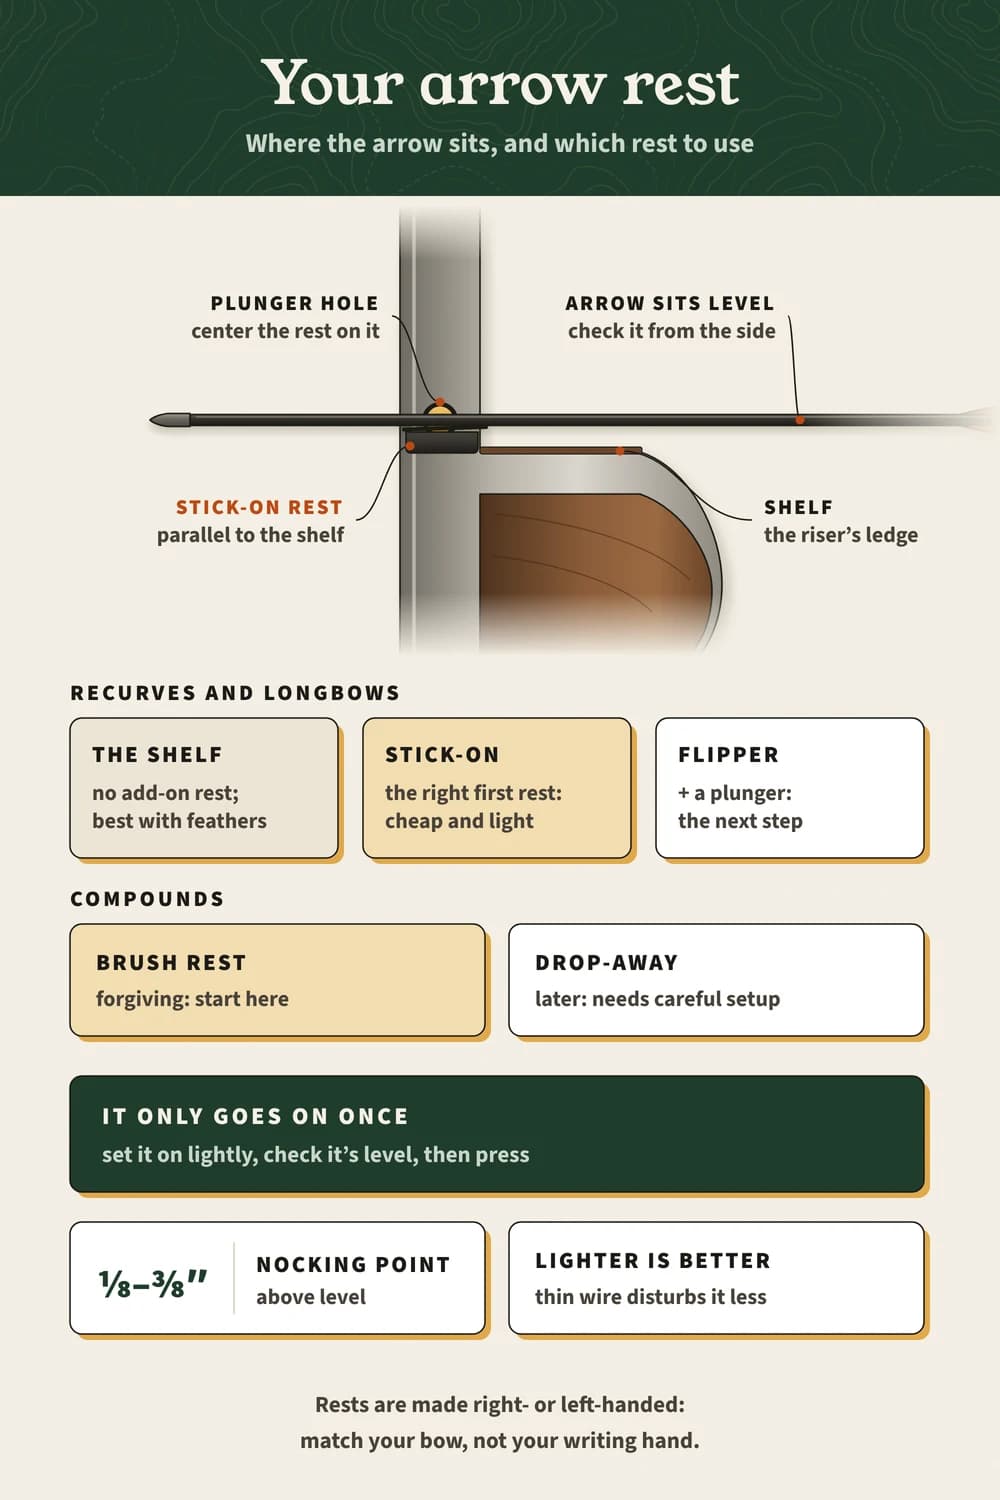
- Fit it centered on the plunger hole and parallel to the shelf, and don’t press it down until the arrow sits right.
- A flipper rest and plunger come next, and the thinner the wire, the less it disturbs the arrow.
- Compounds use a brush (full-containment) rest or a drop-away that falls out of the arrow’s way.
Where is the arrow supposed to sit? Your new bow came with a bare shelf and a tiny plastic part in the box, and nobody told you. 🤔
On a beginner recurve, a simple stick-on rest is all you need; a plunger can come later for fine-tuning. The recurve buying guide covers the rest of the setup, so your misses come from form, not gear.
How an arrow rest works on every shot
When you draw the arrow needs somewhere to sit on the bow. The rest holds it in the same spot every shot and guides it as the string pushes it forward.
That spot matters because the arrow bends as it leaves the bow. A rest that holds it consistently and then gets out of the way gives you straighter, more repeatable arrow flight.
- Holds the arrow at full draw, so it doesn’t slide off.
- Sets the height the arrow leaves from, together with the nocking point on the string.
- Clears the fletching as the back of the arrow passes the bow.

// Free printable
Get the range log I actually use.
Seventeen printable pages: session log, score tracker, a 30-day drill challenge, a bow maintenance card, a first-season checklist and more. Join the monthly email and it lands right away.
Choose your arrow rest: shelf, stick-on, flipper, brush or drop-away
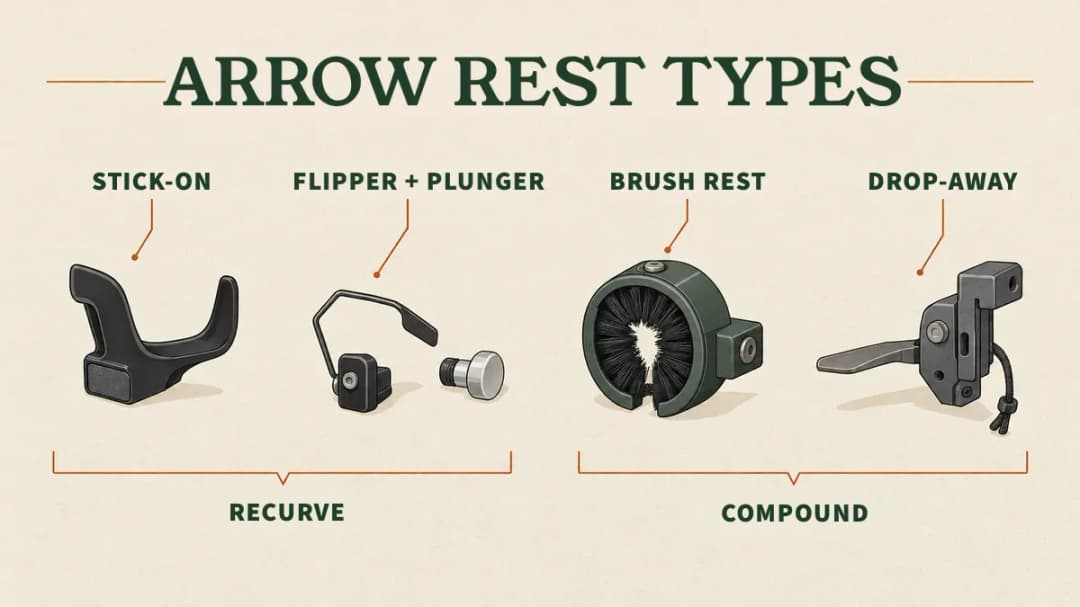
There are a handful of rest styles, and wich one you use mostly depends on your bow. Recurves and longbows use the first three; compounds use the last two.
| Rest | How it holds the arrow | Usually used on | Good for beginners? |
|---|---|---|---|
| The shelf | The arrow lies on a covered ledge cut into the riser | Longbows and traditional recurves | Yes, best with feathers |
| Stick-on rest | A small plastic arm, stuck to the riser above the shelf | Recurves | Yes, simple and cheap |
| Flipper rest + plunger | A wire arm that folds away, with a spring button against the side of the arrow | Recurves, Olympic style | A good next step |
| Brush rest | A ring of bristles that holds the arrow on every side | Compounds, often for hunting | Yes, very forgiving |
| Drop-away rest | An arm that lifts the arrow, then drops as you shoot | Compounds | Later, it needs careful setup |
Shooting off the shelf: the simplest rest of all
Many longbows and traditional recurves have no add-on rest at all. The arrow sits on the shelf, a ledge cut into the riser just above your hand, usually covered with a thin pad of felt, hair or soft material.
Shooting off the shelf usually goes with feathers. Feathers fold as they brush past the shelf, while stiff plastic vanes can kick the arrow off line (more in the fletching guide).
Stick-on and flipper rests for recurve bows
Most beginner recurves leave the factory with a simple stick-on rest (or one in the box). It raises the arrow off the shelf, so vanes clear the bow and carbon arrows fly fine.
- Stick-on rest: a molded plastic arm with an adhesive back. Cheap and set-and-forget, but it usually breaks if you pry it off to move it.
- Flipper rest: a thin wire arm that folds out of the way if the fletching hits it. Adjustable for height on many models.
- Magnetic and bolt-on rests: screw into the riser’s threaded hole and are easier to adjust and replace.
Whichever you pick, lighter is better. Olympian Jake Kaminski, in his recurve rest video, explains why he likes the thinnest wire he can get:
The heavier something is, the more resistance it has to movement, so you really want to try to use the thing that is the lightest and thinnest possible.
His point is that if a vane does touch the rest, a light wire just gets out of the way. For a beginner, that’s an argument for the cheap stick-on, not against it; the one exception he gives is string-walking barebow, where the arrow pushes down hard and heavier bolt-on rests last longer.
How to fit a stick-on rest in 6 steps
A stick-on rest only goes on once: the adhesive usually doesn’t survive being peeled off, so take five minutes to place it right. Here’s the order I’d follow on a recurve.
- Clean the riser where the rest goes with rubbing alcohol, and let it dry completely.
- Find the height: if the riser has a plunger hole, the rest’s hole (or the arrow) should sit centered on it; without one, the arrow should sit just above the shelf.
- Set it on lightly, parallel to the shelf, without pressing down yet.
- Lay an arrow on it and check from the side and from behind that it sits level and centered on the hole.
- Press it down firmly, and give the adhesive the time its packaging asks for before you shoot.
- Set your nocking point about 1/8″ to 3/8″ above level with a bow square, then do a powder test for vane clearance.
Kaminski’s version of steps 2 to 4 is worth hearing, because the trick is in what he doesn’t do:
I’m going to stick it on where the plunger hole is roughly in the center of the hole and then try to make the rest level, and you’ll notice I set it on there but I didn’t push down, because now I can adjust it, move it and move it around.
That “didn’t push down” is the whole lesson. Most crooked stick-on rests were pressed on in one go, and a rest angled up or down sends every arrow off its line from the first shot.
What a plunger adds to a recurve rest
A plunger, also called a cushion button, screws through the side of the riser and presses lightly on the side of the arrow. It isn’t a rest itself; it works with one, usually a flipper rest.
Inside is a small spring. It cushions the arrow’s side-to-side flex as it leaves the bow, and you can move it left or right to set where the arrow points (called centershot).
Where the rest supports the arrow matters once you add a plunger. Kaminski sets the arm so the arrow is held right under the button, not in front of it:
I prefer to have the contact where the arrow is vertically sitting on the rest and supported vertically to be the same distance front and rear that the plunger is.
In plain words: the rest and the plunger should touch the arrow at the same point along it, so a small mistake in your shot pushes the arrow the same way every time. Spring tension can make up a little for arrows that are slightly too stiff or too weak, but it can’t fix arrows that don’t match your bow, so get the arrow spine right first.
Compound bow rests: brush rests and drop-aways
Compound bows use their own rests, mounted on the side of the riser. Beginners usually start with a brush rest, and many archers move to a drop-away later.
- Brush rest (often called a whisker biscuit): bristles hold the arrow all the way around, so it can’t fall off, even if you tilt the bow. Quiet, tough and simple to set up; the bristles do touch the vanes on every shot.
- Drop-away rest: an arm lifts the arrow at full draw, then drops as you shoot, so nothing touches the fletching. It’s tied to the bow’s cable by a cord, and that cord’s timing has to be set right.
For a quick check while you set up your bow, here’s the arrow rest on a single page.
// FAQ
Frequently asked questions
Quick answers to the questions readers ask most.
Do I need an arrow rest on a recurve bow?
Not always. You can shoot off a covered shelf, ideally with feather fletching. If you shoot carbon arrows with plastic vanes, a stick-on rest is the easy choice.
What’s the best arrow rest for a beginner?
On a recurve, a simple stick-on rest. On a compound, a brush rest. Both hold the arrow well and need almost no adjusting.
Can I shoot vanes off the shelf?
You can, but vanes don’t fold like feathers, so they’re more likely to bounce off the shelf and fly erratically. A raised rest lets vanes clear the bow.
Where should the arrow rest go?
Just above the shelf, with the arrow sitting level with the nocking point and lined up with the plunger hole if your riser has one. A pro shop can set it in a few minutes.

Final thoughts
The rest is a small, cheap part that every arrow touches. Start simple: the shelf or a stick-on rest on a recurve, a brush rest on a compound, and upgrade once your form is steady.
When you change rests, check your brace height and nocking point too, and note the change in the free range log so you can see what it did to your groups.
