

- Use a bow stringer every time you string or unstring a recurve or longbow; never step through the bow.
- Buy a pocket-and-saddle stringer in a length that suits your bow: it’s the usual pick for recurves.
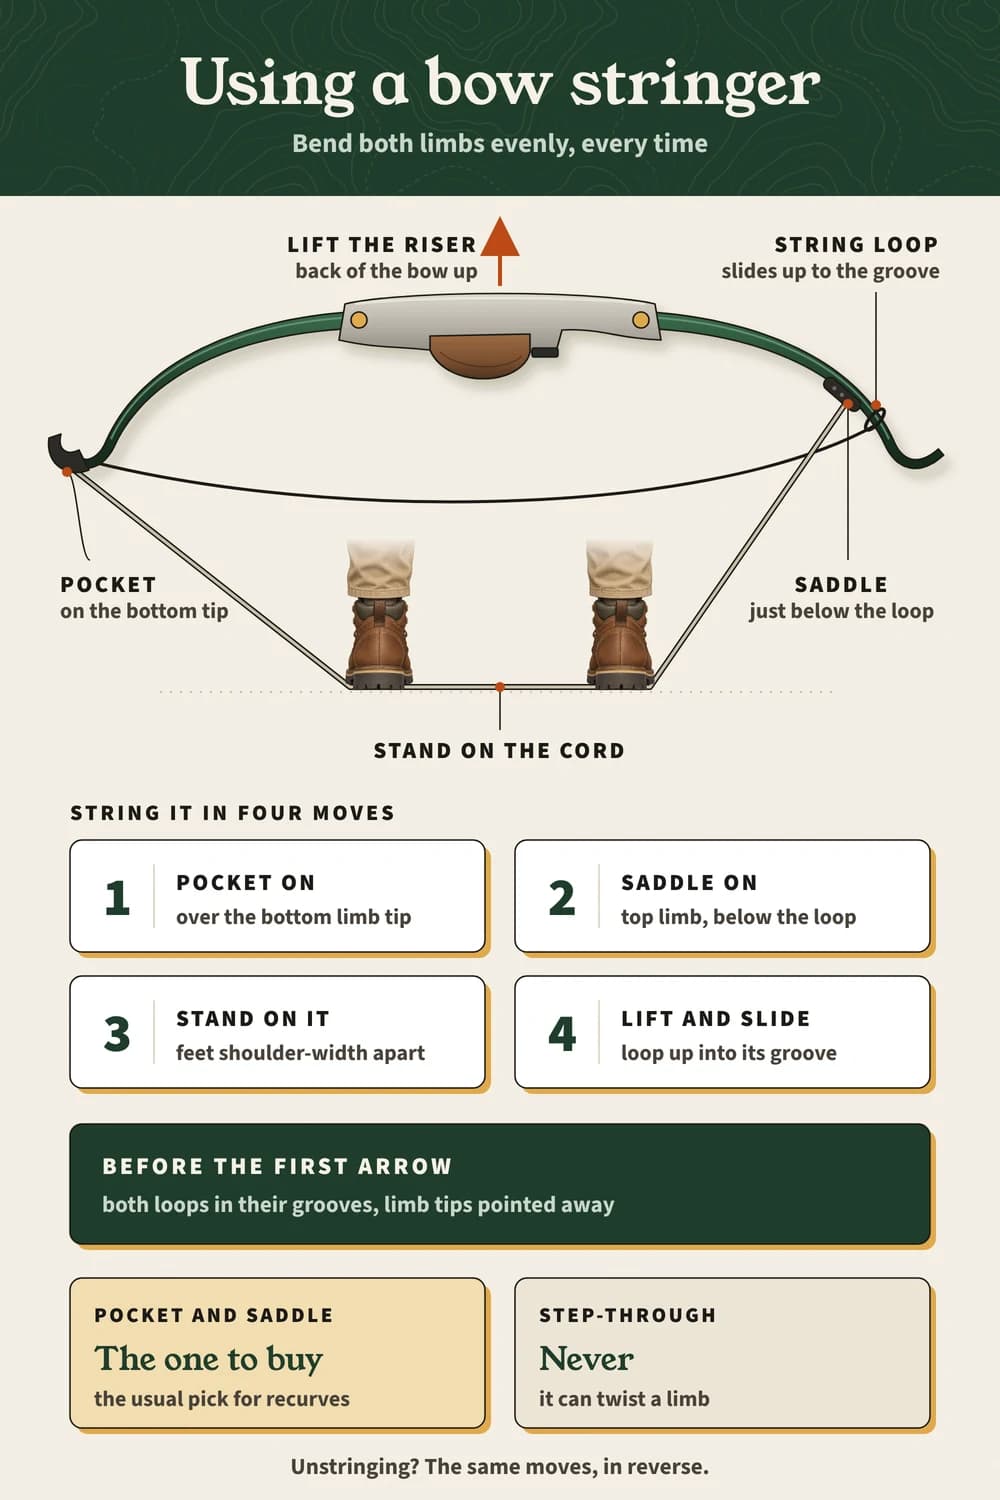
- Stringing takes four moves: pocket on the bottom tip, saddle on the top limb, stand on the cord, slide the loop up.
- Before the first arrow, check both loops sit in their grooves, with the limb tips pointed away from you.
Bending a recurve by hand to string it is how limbs twist and tips end up in faces. 😬
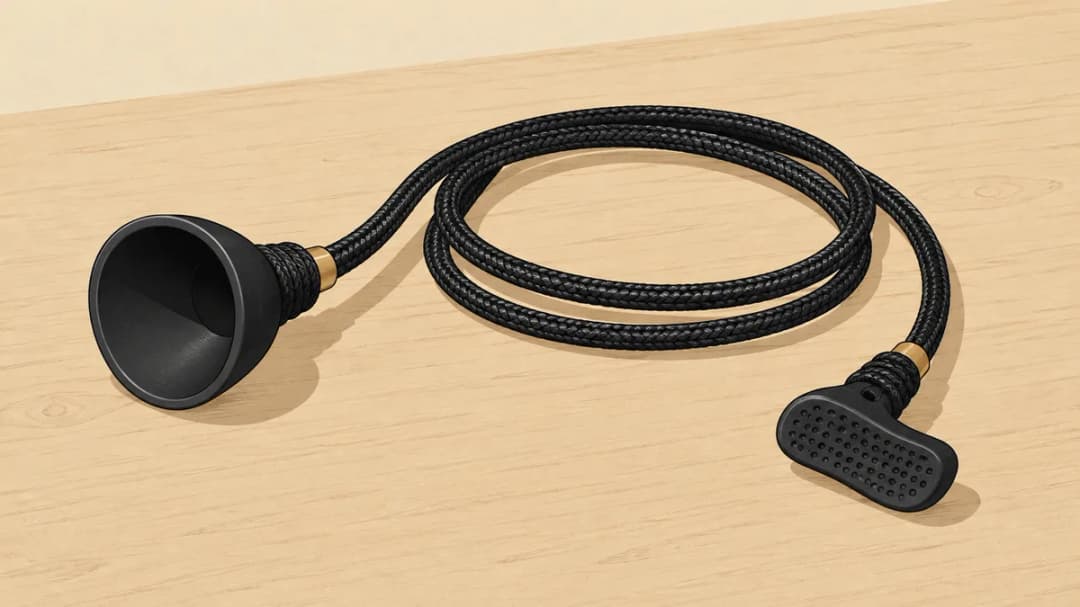
A bow stringer is a cord with a holder at each end that bends both limbs evenly, and using one every time is the whole answer. It costs little and saves your bow, and the recurve buying guide lists it with your other starter gear.
Which bow stringer to buy: pocket and saddle or double pocket
You stand on the cord and lift the bow, which bends both limbs at once so the string loop can slide into place. The bottom end is always a large pocket over the lower limb tip; the top end comes in two styles.
| Type | Top end | Where it sits | Best for |
|---|---|---|---|
| Pocket and saddle | A dimpled rubber saddle | On the upper limb, just below the string loop | Most recurves, and the easiest to learn on |
| Double pocket | A smaller pocket | Over the upper limb tip, so the loop can drop into the groove | Recurves and longbows alike, if you prefer it |
Buy the pocket-and-saddle type for a first recurve. The saddle grips the limb face, which leaves the tip free for you to see the loop slide home.
// Free printable
Get the range log I actually use.
Seventeen printable pages: session log, score tracker, a 30-day drill challenge, a bow maintenance card, a first-season checklist and more. Join the monthly email and it lands right away.
Why not the step-through method?
The step-through method means stepping between the string and the riser and bending the bow against your leg. It pushes one limb harder than the other and can twist it, and a twisted limb shoots badly or breaks.
- Uneven bend: your leg and hand load the limbs differently, which can twist them over time.
- Takedown bows: it also puts uneven stress on the limb bolts.
- Your face: if the loop slips, the limb tip snaps back close to you.
- Warranty: some limb makers say never to string without a stringer, and they don’t cover damage from misuse.
How to string a recurve with a bow stringer
Watch it done once before you try. When I first picked up a bow I skipped the how-to videos entirly:
I didn't even look at a video. I just thought I could figure it out, and I could not.
Five minutes with a video, or with someone at your range, saves you a lot of guessing. Then follow these steps:
- Loops on: put the larger string loop over the upper limb and slide it down a few inches; seat the smaller loop in the lower limb’s groove.
- Stringer on: fit the large pocket over the lower limb tip and the saddle (or small pocket) on the upper limb, just below the loop.
- Stand on the cord: hold the riser, back of the bow facing up, with both feet on the cord about shoulder-width apart.
- Lift and slide: pull the riser straight up so the limbs bend, then slide the upper loop up into its groove.
- Ease off slowly and let the string take the tension, then remove the stringer.
How to unstring your bow
Unstringing is the same steps in reverse. Use the stringer for this too; pulling the loop off by hand is just as risky as putting it on.
- Stringer on the same way: pocket on the lower tip, saddle on the upper limb.
- Stand on the cord and lift until the string goes slack.
- Slide the upper loop out of its groove and down the limb, then ease the bow back down.
Stringing never feels completely routine. Even for me:
I had a ton of scary moments stringing my bow. I typically leave it up, but I have had to take it down once or twice, particularly when I was moving from Ohio to Washington. It's always a little nerve-racking for me.
Nerves are fine; shortcuts aren’t. Slow, even pressure on the cord is what makes it safe, every single time.
Stringing problems and how to fix them
Most stringing trouble comes from where the stringer or loop sits, not from strength. Stop, ease the bow down and reset before you try again.
- The pocket slips off the bottom tip: push it all the way over the tip before you lift, and check the stringer suits your bow’s length.
- The saddle slides up or down the limb: set it just below the loop, on the limb’s face, and lift straight up rather than at an angle.
- The loop won’t reach its groove: lift a little further with even pressure, and check the top loop is the larger one.
- The string sits off to one side: unstring and check that both loops are seated and the limbs aren’t twisted.
Check the string before you shoot
A loop that isn’t fully seated can slip off at full draw. Check both ends before you nock an arrow, every time you string the bow.
- Hold the bow at arm’s length with the limb tips pointed away from you and from anyone nearby.
- Look and feel: run a finger over each limb tip to confirm the loop sits fully in the groove, upper and lower.
- Check the string is centered on the limbs and not twisted off to one side.
- Check your setup: measure your brace height and make sure the nocking point and arrow rest haven’t moved.
Keep this page handy the first few times you string up: it's the whole routine in four moves.
// FAQ
Frequently asked questions
Quick answers to the questions readers ask most.
Do I really need a bow stringer?
Yes, for any recurve or longbow you string yourself. Many bow makers say to always use one, and it protects both the limbs and your face.
Can I use a bow stringer on a compound bow?
No. A compound’s string is held by cams and needs a bow press to change; a bow stringer is for recurves and longbows.
How do I know the string is on correctly?
Both loops sit fully in their limb grooves, the string runs down the middle of the limbs, and the brace height matches what your bow maker recommends.
Which bow stringer should I buy?
A pocket-and-saddle stringer, the usual choice for recurves, in a length that suits your bow. The double-pocket type works too.
Should I leave my recurve strung?
For a day of shooting, usually yes. For storage and travel, follow your bow maker’s manual.

Final thoughts
A bow stringer is the cheapest insurance for your bow. Use it every time you string or unstring, and check both grooves before the first arrow. While the string is on, keep it waxed (here’s how to wax a bowstring).
Shopping for your first bow too? Start with the best recurve bows for beginners, and note your brace height in the free range log each time you string up.
